Getting Started
In this guide you'll install the LiveDoc Viewer, start the dashboard, connect it to your test framework, and watch test results appear in real time — all in under five minutes.
What You'll Build
By the end of this page you will have:
- The LiveDoc Viewer running at
http://localhost:3100 - A test reporter sending results to the viewer
- A live dashboard showing features, scenarios, and step results as tests execute
Prerequisites
- Node.js 18+ installed
- A project using @swedevtools/livedoc-vitest or LiveDoc.xUnit (.NET)
Step 1: Install the Viewer
- Global (recommended)
- Dev dependency
npm install -g @swedevtools/livedoc-viewer
npm install -D @swedevtools/livedoc-viewer
Step 2: Start the Viewer
livedoc-viewer
The viewer opens your default browser at http://localhost:3100 and waits
for incoming test results.
Custom port
Step 3: Connect Your Test Framework
- Vitest (TypeScript)
- xUnit (.NET)
Add LiveDocSpecReporter to your Vitest configuration — it auto-discovers
a running viewer and publishes results automatically:
// vitest.config.ts
import { defineConfig } from 'vitest/config';
import { LiveDocSpecReporter } from '@swedevtools/livedoc-vitest/reporter';

export default defineConfig({
  test: {
    include: ['**/*.Spec.ts'],
    globals: true,
    reporters: [
      new LiveDocSpecReporter({
        detailLevel: 'spec+summary+headers',
      }),
      // Auto-discovers the viewer — no extra reporter needed
    ],
  },
});
For explicit control over the viewer connection, use LiveDocViewerReporter
as a post-reporter:
import {
  LiveDocSpecReporter,
  LiveDocViewerReporter,
} from '@swedevtools/livedoc-vitest/reporter';

reporters: [
  new LiveDocSpecReporter({
    detailLevel: 'spec+summary+headers',
    postReporters: [
      new LiveDocViewerReporter({
        server: 'http://localhost:3100',
        project: 'my-project',
      }),
    ],
  }),
],
Add the [LiveDocViewerReporter] attribute to your assembly:
// In your test project (e.g., AssemblyInfo.cs)
[assembly: LiveDocViewerReporter("http://localhost:3100")]
See the xUnit Getting Started guide for full details.
Step 4: Run Your Tests
npx vitest run
Switch to your browser — the viewer dashboard updates in real time as each scenario and step completes.
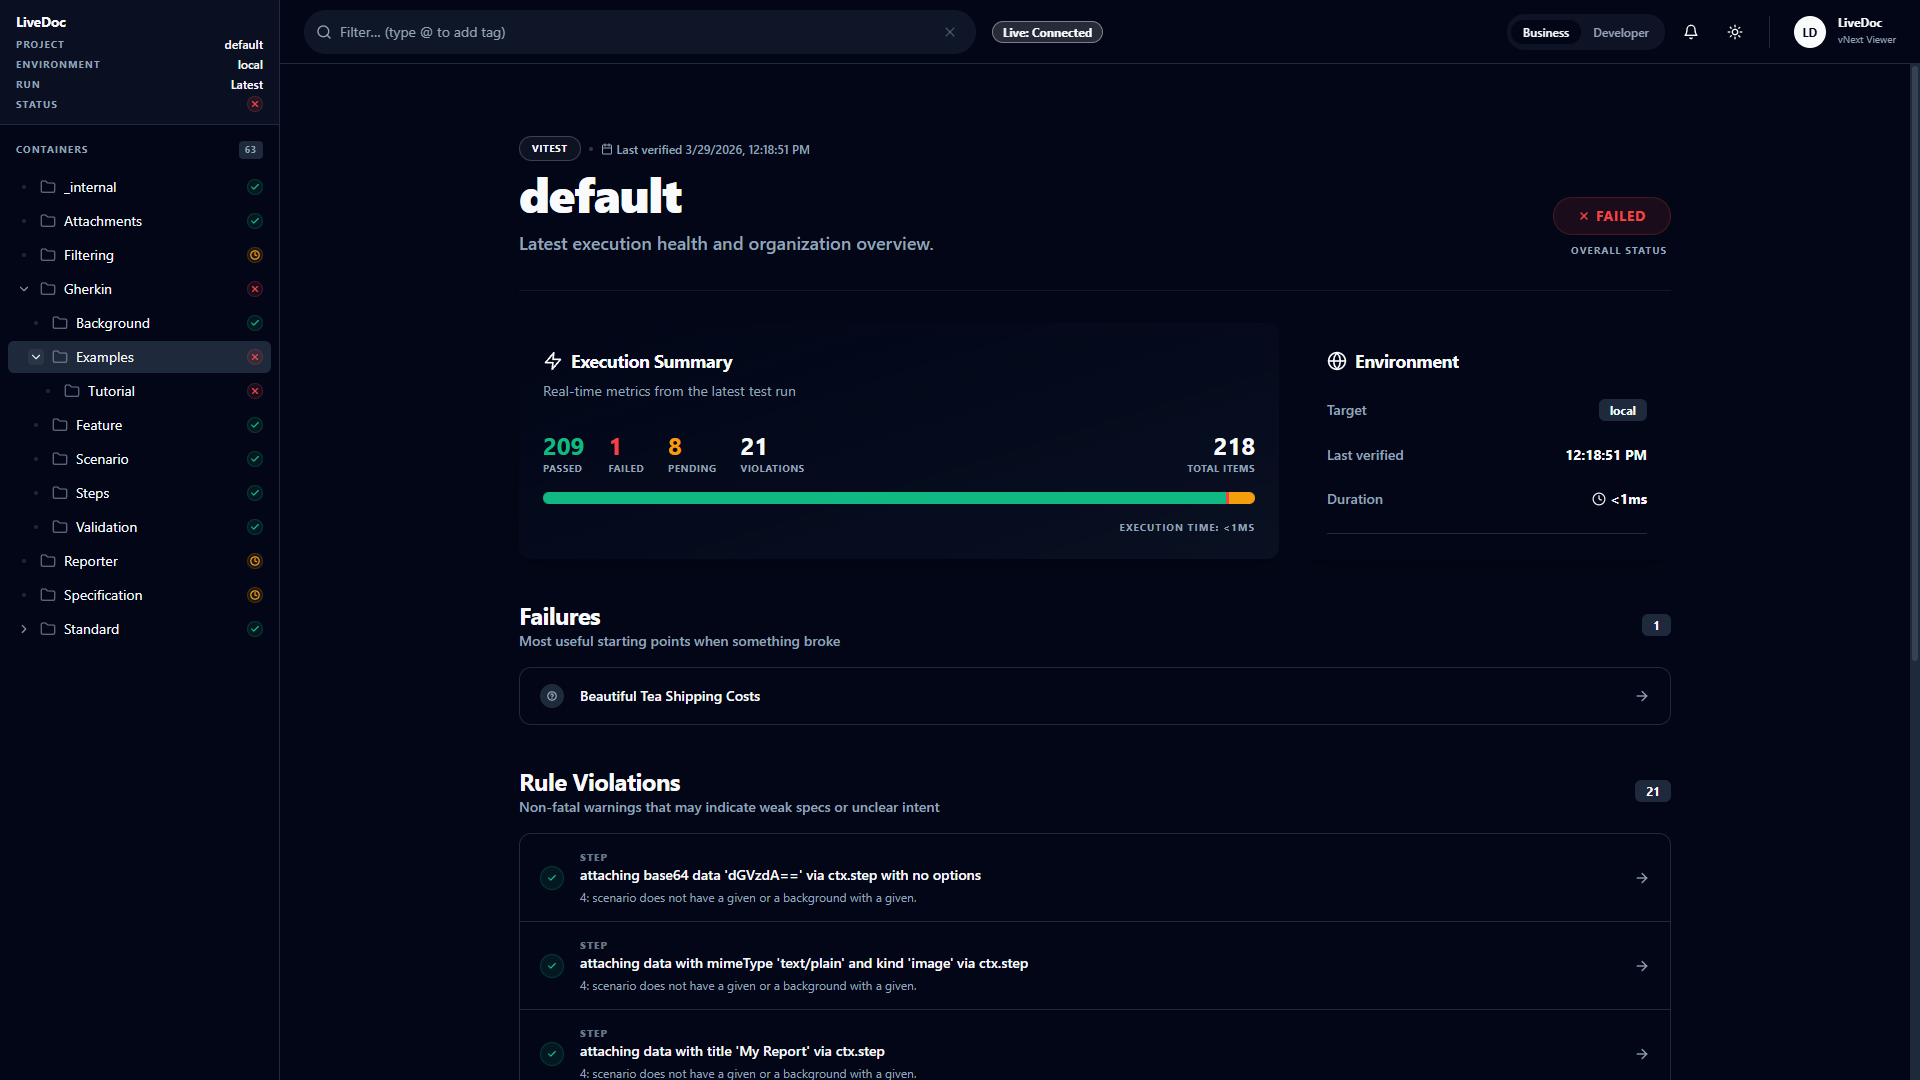
The Workflow
- Start the viewer —
livedoc-viewer - Run your tests —
npx vitest run(ordotnet test) - Reporter posts results — each scenario streams to the viewer as it finishes
- Dashboard updates live — features, scenarios, and steps appear in real time
- Debug failures — click any failed step to see the error message and stack trace
Recap
- Install with
npm install -g @swedevtools/livedoc-viewer - Start with
livedoc-viewer(opens athttp://localhost:3100) - Connect via
LiveDocSpecReporter(auto-discovers the viewer) orLiveDocViewerReporter(explicit URL) - Run tests and watch results stream into the browser
See it live
Next Steps
- Explore the UI: Understanding the UI — learn what each panel shows
- CLI flags: CLI Options — all command-line options
- CI pipelines: CI/CD Dashboards — run the viewer in CI